Sunday, February 8, 2015

Crispy Kimchi and Shrimp Pancakes-Kimchi Jun 김치전


Kimchi Pancake,

Oh, how I love thee.  Let me count the ways.  Never forget...

You is savory.
You is crispy.
You is important.

Sorry, folks. If you haven't caught on by now, I'm a bit of a crazy person.

Hey.  Did you know that Korean cuisine has a whole line of SAVORY pancakes.  We don't call them pancakes.  We actually call them jeon/jjun/jun/전 or buchim/bucheem/부침. 

They are nothing like the pancakes we have in America for breakfast. Think of them as pan fried circles of yummy, savory stuff like kimchi, tofu, meat, seafood, green onions....Sounds incredible, right?!

I learned how to make kimchi pancakes from my mom.  This version of kimchi pancakes uses shrimp.  I'd never had them with shrimp for most of my life, but a few years ago, I spent 6 weeks in Korea and my aunt chopped up raw shrimp and added it to the batter.  At first I was like, "What???".  But then I tasted them and I was like, "WHUT!!!!".  And then I made her make them for me almost every day while I was there.

My aunt told me that Koreans eat jun on rainy days.  I think they associate the sound of rain falling on the roof with the sound of sizzling oil when making jun.  Whatever the reason, it's freaking brilliant.  Luckily, I was in Korea for the monsoon season so it rained almost every day.  But guess what?  You don't have to wait for a rainy day (especially since it hardly rains in So. Cal). Let's eat!

You don't have to use shrimp, but you should.  I also love them with shredded Krab (remember crab with a "k" is not real crab, but the stuff made to taste like crab using fish).


Adding shrimp or krab adds an occasional bite of sweet among the spicy, salty kimchi and I actually won't make kimchi pancakes unless I have shrimp or krab on hand.  

Here's the spread:

kimchi
jalapeno (optional)
shrimp or krab (optional)
jun powder
fry powder
water
oil for frying


So, here's the big secret to making your kimchi pancakes crispy...... 
Use fry powder AND pancake powder.  You can get both at any Korean market.  I don't really stick to one brand.  I happened to have purchased the Bear brand recently.  There's also Ottogi brand and a bunch of others.  Make sure you read the label carefully and get one of each.  I used to just use the pancake mix and fry longer, but that doesn't make your jun crispy.  They just get burnt.


The next part of making really good kimchi pancakes is to use older more pickled kimchi.  I mentioned using more fermented kimchi makes for better kimchi fried rice in this post.  Remember, when you buy your kimchi from the store, it will most likely be on the newer side so plan ahead so you can give it time to ripen up before using in this recipe.

I must confess that I'm not one for measuring things out.  I just eyeballed things.  So for this post, I actually measured as I went along so that if you're trying this recipe, you can follow the measurements.  If you make this enough, you won't need to measure as you get better and get a hang of the how thick your batter should be to ensure a good, crispy kimchi jun.

I used one cup of kimchi for this recipe.


Rather than get the kimchi juice all over my cutting board, I simply use kitchen scissors to cut up my kimchi into nice bite sized pieces like this:


After I'm done, it looks like this.  Remember to cut all the pieces on the bottom too.


I used a dozen medium sized shrimp.  After removing the tails, I used the same scissors to cut up into bite sized pieces.


Like this...


I love to use jalapeno in my kimchi pancakes.  You certainly don't have to.  I really enjoy the added bite of jalapeno spice and flavor.  For this batch, I used half of a medium sized jalapeno.   


Slice the jalapeno in half lengthwise.  I removed some of the capsaicin (the white membrane part that houses the seeds and the HEAT) because this particular jalapeno was mean, mean spicy.  To test the spiciness of a jalapeno, simply lick the stem that you cut away.  Just a little lick will give you an instant idea of how spicy it is or isn't.


Finely mince the jalapeno into tiny pieces.


Now, it's batter time.  BATTER UP!

I used a cup and half of BOTH pancake mix and fry mix.  So 3 cups in total.  To that, I added 1 cup of cold water.  If your batter seems overly thin, you can add more pancake and fry mix.  Or if it's seems too thick, add more water.  But just add a little bit at a time so you can get the right consistency.
I put in less water to start because your kimchi adds liquid too.  So wait until you add your kimchi before you decide if you need more water.


To your batter, add in your finely diced jalapeno, chopped shrimp and the cut up kimchi.


I use a large spoon to mix it all up and it will look like this:


The consistency of the batter should be like this:


Add more water of pancake/fry mix as necessary.


It's time to cook them up!  
I use a large non-stick frying pan for this job.  I also use olive oil to fry my kimchi jun, but you can also use canola or vegetable oil.  

Over medium to medium high heat, I add a generous amount of oil to my frying pan.  Another really important part of getting your jun crispy is to not skimp on the oil.  I have tried to use less oil thinking it would make them "healthier", but all it left me was with flat, disappointing kimchi jun.  


You've got some choices here.  Make large pancakes or smaller pancakes.  I like to make smaller ones because obviously you end up with more crispy edges.  You can go large and just use scissors to cut them into more manageable pieces for eating.  I'll be honest, if the weather is warmer then I usually make larger ones to get done faster.  There's nothing worse to spending all this effort to make these delicious jun and then getting too hot and sweaty to eat them.  Sometimes, I'll start out making small and then make large ones when I start getting sweaty and cranky.  Since it's a nice cool night here in LA, I opted to make the smaller sized pancakes.

For making smaller pancakes, I use a large spoon and spoon about two or three scoops of batter for each pancake.  Use the spoon to spread the kimchi and shrimp around.  Sizzzzzzzzle.

The edges will eventually begin to look less pink. Flip them over when they start to look like this:


Add oil into the pan before you start the next batch.  

Crispy.  Delicious. Get in my belly.


You can see the nice bites of sweet shrimp cooked in the kimchi jun...


Here's another pic just because.  Notice the crispy edges?  Yeah.  This is it, friends.


This recipe made 10...no wait, 12 crispy kimchi pancakes with shrimp 
(I ate two while I was cooking them!).

And one little left over crispy pancake that I of course had to eat because it was too small to serve to anyone.  


Thursday, February 5, 2015

Quick Home Fries-Chili Oil Style


When I was a kid, I was notorious in my family for my love of potatoes.
I seriously could eat potatoes everyday.  For every meal.  You think I'm kidding, don'tya? I am not.

The family joke (aside from the "We found you next to a trash can" one) was that I should grow up and marry a potato farmer....Oh families.


The result of my potato obsession is my inherent knack for knowing how to cook potatoes in amazing, delicious ways.  I mean, I still have potato recipes yet to be made up.  I can make home fries a hundred different ways.  Once, on a family vacation, I made breakfast for the entire time we were vacationing and my niece was just amazed at all the different ways I came up with making breakfast potatoes.  I am the potato master....Yes.  This is my super power, if you will.

Without further ado, here is one of my many, many versions of breakfast potatoes that you can have for breakfast, lunch, dinner, snack, you name it.


Here's what you'll need:

 olive oil
 half a chopped onion
 half a chopped bell pepper
 half jalapeno finely diced
 seasoning salt of your choice
 black pepper
 cooked potatoes!!!! Yes! 3-4 should be ample.


In cooking, starting with onion, celery and carrots is called mirepoix.  For me, my mirepoix is onion, bell pepper and jalapeno...just saying.

These guys are good friends in my house.  They even sit next to each other on the same shelf...


Po-Tae-Toes!!  


Sorry.  Couldn't resist.  I use left over baked potatoes and if I don't have any, I just throw a few in the microwave and nuke 'em.  


Start with about a tablespoon or so of olive oil and on medium heat, begin to saute your onion, bell pepper, and jalapenos.  Season with pepper and seasoning salt.

While those are cooking, chop up your cooked potatoes.  You can off course use uncooked potatoes, I have a another version of potatoes that starts with uncooked potatoes.  It works wells with raw too, but if using raw then I would suggest you cube them smaller so they cook faster and remember to keep your cubes uniform and as close to the same size as possible to ensure even cooking.


When your veggies begin to look kind of translucent, add your chopped potatoes into the skillet and remember to season with pepper and seasoning salt.


I also add about a teaspoon of chili oil that I make at home.  You can also add chili garlic sauce, Tabasco, Frank's Red Hot Sauce, or any kind of spicy sauce you want.  


I saute everything together and that's it! 


Because you started with already cooked potatoes, all you need to do is make sure the potatoes get covered in onion, pepper and jalapeno deliciousness and that's it!  If it seems a little dry, add more oil or a tablespoon of water.  I love that this recipe is super fast to make.  


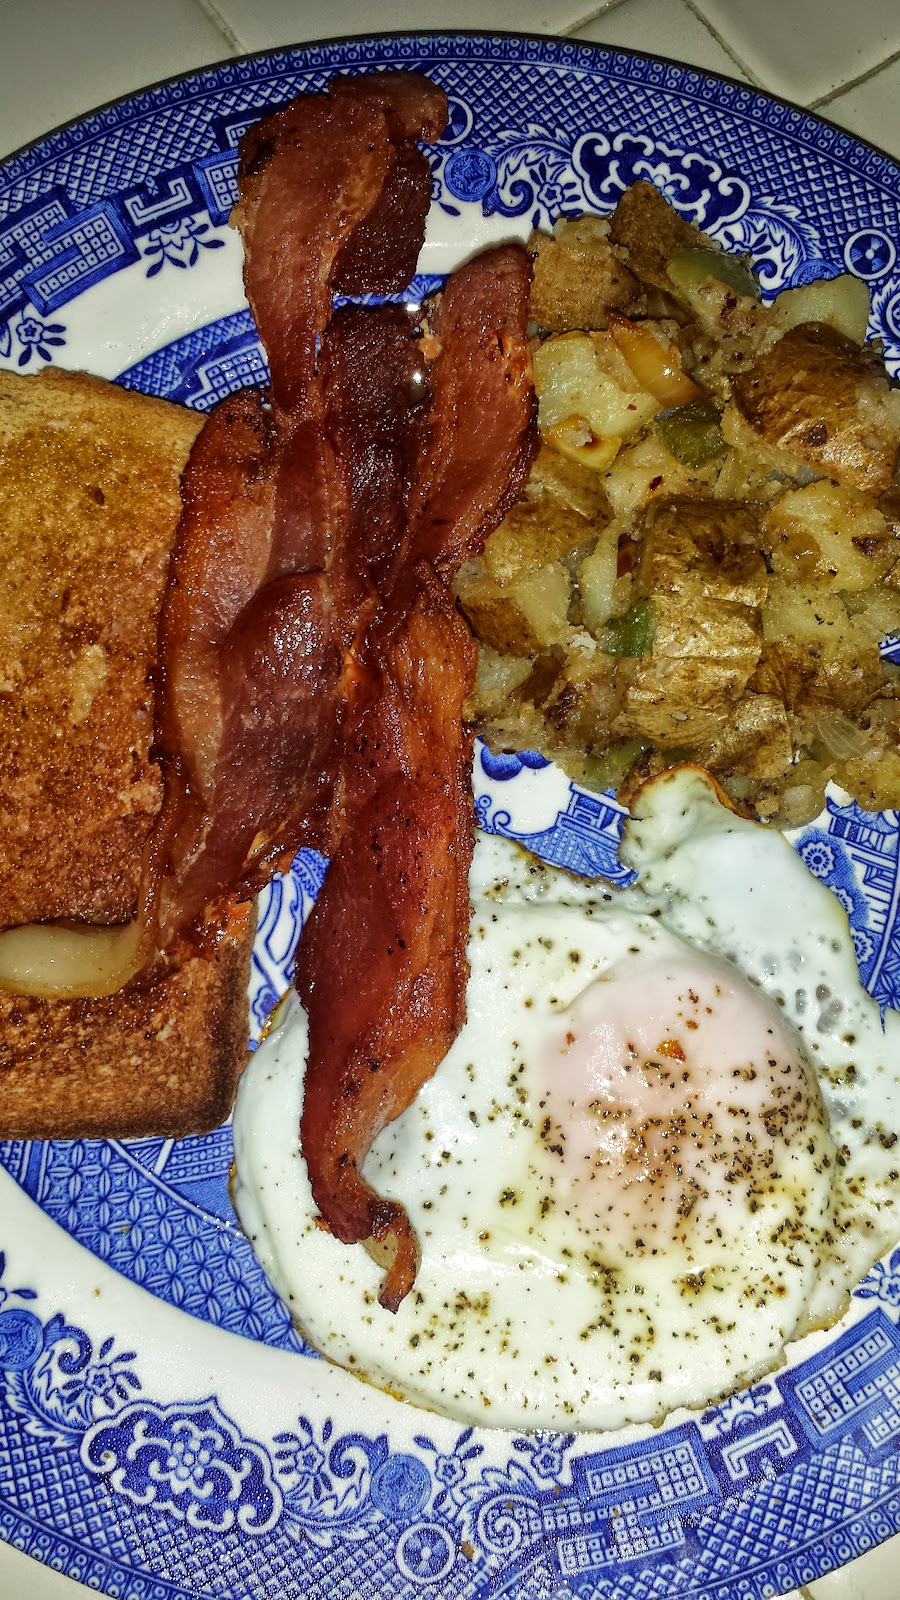
You can serve them with bacon and eggs like this:


I love to add them into tortillas with cheese and make potato tacos.  All Purpose Green Hulk Sauce is delicious over these potatoes too!

This recipe makes enough for one....me.  Or 4 servings for normal folks.


Monday, February 2, 2015

Kimchi Fried Rice with SPAM


A dear colleague and friend of mine is about to go out on maternity leave.  She ever so sweetly asked me to post a how to for kimchi fried rice.

So Jo Ann, this is for you...


There are 4 ingredients to making this bad boy.

The culprits are:

about 2-3 cups of Kimchi
3-4 slices of Spam
4 cups of Rice
1 tablespoon of Seasame Oil

I used:

C'mon.  The label says less fat, sodium and calories.  It's right on the label!

Normally, I buy this brand of kimchi, 


But the last time I was at the market, I decided to buy a smaller jar and bought this one:


The best kimchi hands down, is the one made by my mother.  But since I didn't have any of my mom's kimchi on hand, like any good Korean American girl, I drove to my nearest Korean market and bought some.  Look.  In theory, I know how to make kimchee.  I've seen my mother do it thousands of times.  She's explained it to me a hundred and four times.  She's made me help her a make kimchi before too.  But there's this....unscientific science to kimchi and I just know that my kimchi won't taste right.  Let's get real.  Where am I going to find the time to buy napa cabbage, slice napa cabbage, soak in salted water over night, and all that jazz?  

The other tip to kimchi is this.  There are different degrees of fermentation.  There's new, new kimchee that's literally just freshly seasoned after removing from salted water- my pop loves it this way.  Me?  Not so much.  I like mine old.  Like old, old so that's it's kinda of zingy and nicely pickled.  You'll find people prefer their kimchi anywhere along that scale from new to old.  I like the richer more developed flavor of older kimchee.  In fact, you'll find that kimchee fried rice and kimchee chigae (stewed kimchee) tastes better with older more fermented kimchi.

So when you run out to buy your kimchi, chances are you'll find it is on the newer, less fermented side,  Just let it sit in your fridge for a few days.  If you're in a rush, just leave it out over night in your sink.  It will ripen up quickly.  The warmer the weather, the faster kimchi will ripen.  Also, be aware that as kimchi ripens and ferments, it can OVER FLOW out of the jar. So keep it in your sink or make sure you have paper towels under the jar if it's in your fridge. 

For this recipe, I used about 2 and half cups of kimchi.  I'm guess-timating because I usually just eyeball it and let my stomach tell me how much to make.  If you make this enough, you'll get the feel for what ratio of kimchi to rice you like.  

On medium to medium high heat, add kimchi into your frying pan or skillet.  Of course, I'm using my cast iron skillet.  I adore mine.


You can just leave the kimchi the size it comes out of the jar, but I like mine smaller and more bite-sized.  I used to use a knife and cutting board, but I hated getting the kimchi juice everywhere as I was chopping it. Plus it stained my cutting board this orange color that was super hard to get off.  So what's a girl to do?  Cue the kitchen scissors!  Yes!  I use kitchen scissors to cut up my kimchi directly in the skillet.  Genius!  No mess and no fuss.  Boom!


After using the scissors to cut up the kimchi into smaller pieces, it looks like this:


To this, add one tablespoon of sesame oil.  I use this kind:


If you aren't familiar with sesame oil, it has a really strong, rich flavor.  I don't use it for cooking food.  I use it to flavor food.  The point here is to get the sesame flavor into your kimchi fried rice. 

Now.  Onto a topic that is near and dear to my heart.  Spam.  Some people love it (Me! Me! Me!).  Some people hate it (Boo! Boo! Boo!).  If your don't like it, don't use it.  You can use ham or ground beef, ground pork, or even leave out meat altogether (Trader Joe's has a frozen vegetarian kimchi fried rice).   But for me, I love mine with spam.  It's how my ma made it for me and it brings back great childhood memories.  I have a friend who once made her mom fry up chopped up spam to add into the meatless kimchi fried rice she had made for her.  (HAHAHA!  Kitty!  You know it was you!) 

I grew up eating spam and I remember my grandmother talking about how precious spam was to them during the Korean War.  In fact, there's something in Korean cuisine called 부대찌개 (budae chigae) or translated it's called Army Base Stew and it has hot dogs and spam in it.  It's a part of my culture and I don't have a problem with it.  If you have a hard time with it, then feel free to leave it out.  More for meeeeeee!

I used regular flavor spam (they have all kinds didn't ya know?) but whenever possible, I use Spam Lite. For this recipe, I used three slices (okay...I might have decided it could use more spam and added another slice as I was cooking.  Shrug.)

First, I cut into three slices about this thick:


Then I cubed them.  Feel free to cut them into whatever size you like.  I like them on the smaller side so that each bite is not too salty.


Add chopped spam into your skillet with the cooking kimchi


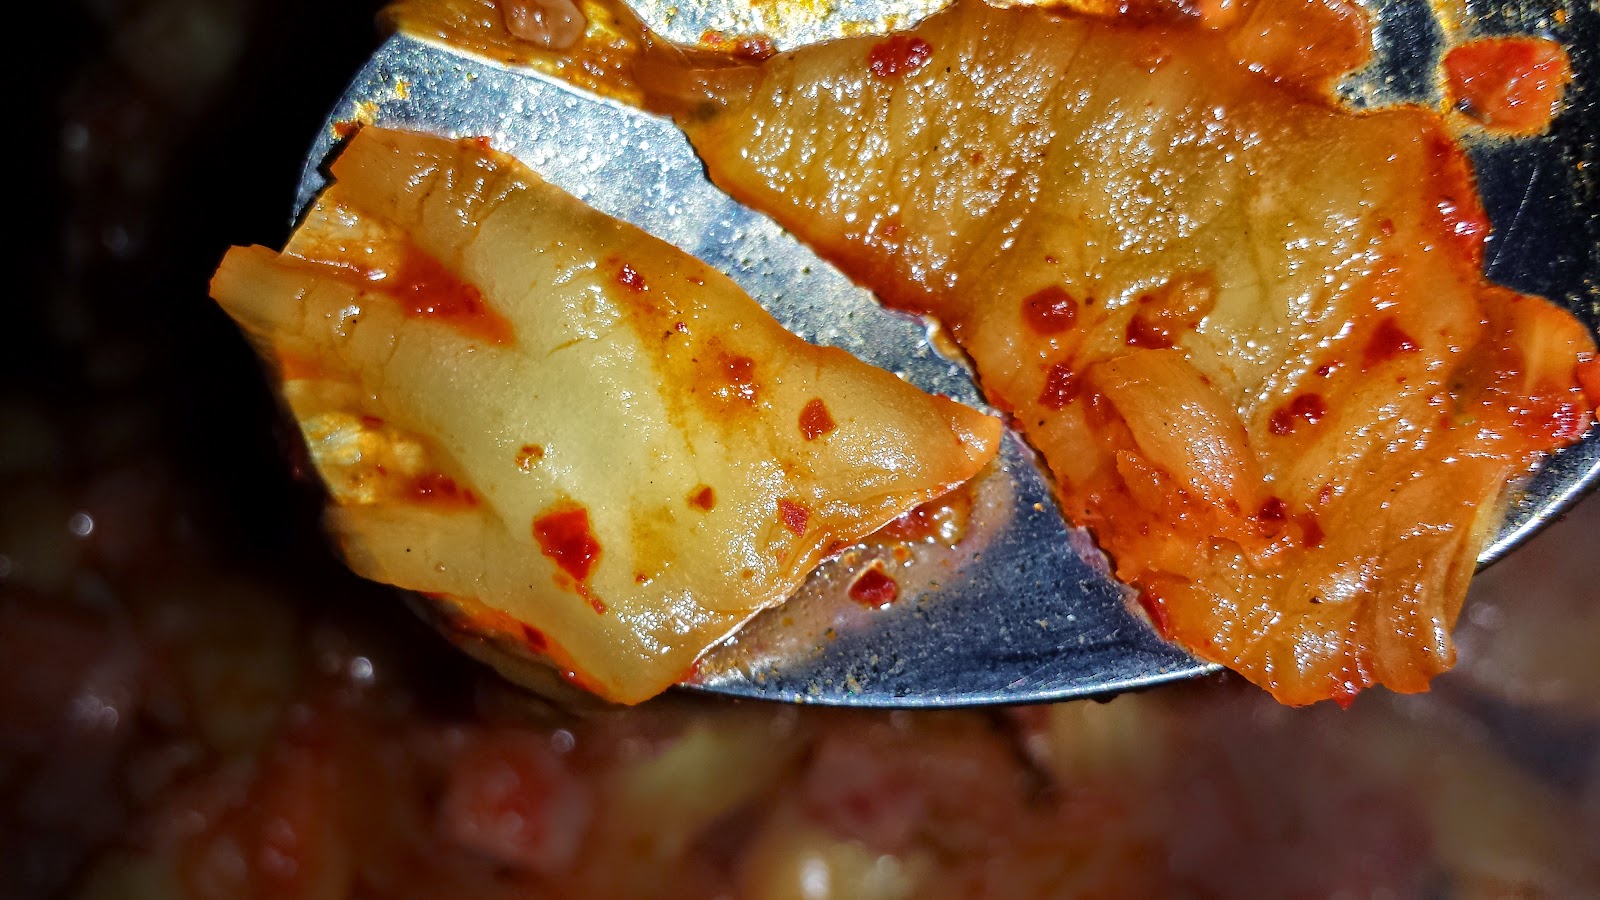
Saute kimchi and spam until kimchi becomes translucent.  
See the difference between the piece on the right and the smaller one on the left?  
The one on the right is more cooked than the other piece and turning translucent.


If the kimchi is starting to stick to the pan, you can add a little bit of water like I did here.  Just a dribble. 
 I would estimate it was about a tablespoon or two of water.


Now it's time to add rice!  Because rice is so nice.  I've used cooked quinoa in place of rice before.  It's a good substitute if you're avoiding rice.  But there's just something about rice.
(I should mention I use short grain brown rice.)

I added two heaping scoopfuls (I would guess it was about 4 cups of rice).  I used freshly cooked rice, but you can use cold rice.  If you use cold rice, add a little more water, add cold rice, spread evenly over the kimchi, cover with a lid and let the rice steam a bit.  I would suggest you add rice as you go.  If you add too much rice, then you'll end up with bland kimchi fried rice.  So start with a scoop and add as you go.

Mix the rice into your kimchee and spam mixture.  Keep stirring to prevent rice from sticking or burning to the pan.


I like to turn the heat down to low and spread my kimchi fried rice evenly in the pan.  The bottom will become nice and crispy.  Or if I'm hungry, I'll just shovel it into my face as soon as it's done.


You can eat with roasted seaweed crumbled into it or an egg over easy on top (Mmmmm.  Egg yolk.)

In case you're curious, this is the kind of rice I use:


Sukoyaka Genmai Brown Rice

That's it.  Super easy.  Super duper delicious.

(Oh and SURPRISE!  I'm bringing this batch to work for you, Jo Ann!  So this really is for you.  Literally!)


Sunday, February 1, 2015

Crack Casserole (Hash Brown Casserole)


I'm not sure where I learned how to make this.  I think I learned this as broccoli casserole first (with ritz cracker crust no less) and was told that I could substitute hash browns and the rest is history!  Who actually dubbed it Crack Casserole I don't remember.  But the name speaks for itself.  Something you shouldn't eat much of, but you can't help but gorge on. I've had friends ask me to make it for them as a bday gift...


 I have a thing for what I call Americana Cuisine.  Or formerly but affectionately known to me as White Trash Cuisine.  Someone pointed out to me that the former name could be considered offensive.  So Americana it is.

Growing up in a household where traditional Korean food was served, I learned to adore lunches at school. School lunches are so different than they were before.  We got hot meals that the kitchen staff made on site.  These wondrous meals included the likes of tuna noodle casserole, square pizza, Salisbury steak, pork and beans. and I adored them all.  Still do.

Crack casserole is the epitome of Americana Casserole.  It has three main ingredients:

Frozen hash browns, shredded cheese (I prefer sharp cheddar cheese) 
and cream of mushroom soup.
 Sour cream is optional.


I add sour cream because it adds a little bit of a tang.  Yum.


I never thought I'd post a how to for Crack Casserole.  It doesn't really involve any real cooking.  But I've had a few people tell me that despite my explaining what to do, their attempts at making crack casserole hasn't turned out the way mine does....This confirms my suspicions that this really is crack and I'm the Walter White of the crack casserole world.  Well, never fear Jesse Pinkman, you will master the making of crack casserole shortly.

I should point out, if you haven't noticed, that the ingredients I'm working with are a three pound bag of frozen hash browns and a mega sized cream of mushroom can purchased at my local Smart n Final.  Today just happens to be Super Bowl Sunday and I've been asked to bring my crack casserole.  I'm making enough for 15 people.  I hope.  If you're making this, you probably don't want to end up with a four pound crack casserole (or maybe you do...no judgement).  

So you can just use 2 regular sized cans of cream of mushroom soup, one standard bag of frozen hash browns that you find at a regular supermarket and you'll end up with a hash brown casserole that feeds about 6.  I think.  (I've made a megazilla batch that included TWO 3 pound bags of hash browns for a work potluck and it didn't feed everyone.....it's crack, I tell ya.)

The other ingredients you'll need are: 


If you are making a normal sized batch, you can mix all your ingredients in a large bowl and then transfer into a rectangular baking pan.  But since I'm making a mega batch, I mix all my ingredients directly  in the baking pan I'll be using to cook my crack casserole.

Add the cream of mushroom soup in first then add your shredded cheese.  I used about half the 2 pound bag of shredded cheese.  Yes.  You read that right.  Go big.  Or go home. If you're doing a regular sized batch two cups should be about right (it's really as much or little as you want.  I like cheese. I use a lot.  I like my crack creamy so I use a lot of soup.  You decide).


I also add my seasoning now.  Mix well.  I've found that it's easier to mix your wet ingredients first and then add your hash browns.  I also add about 1 cup of sour cream.  For your regular sized casserole I would add about 2 heaping spoonfuls.


Once everything is nice and evenly mixed, I add my frozen hash browns.  I don't add the entire bag at once.  I add about a third and mix and continue until everything is mixed and coated in wonderful cheese goo.  Then repeat until the entire bag has been added.


My uncooked crack looks like this:


I use a large spoon to spread it all evenly and that's it.  


Put in your preheated oven at 350 degrees until it's bubbling and melted.  It should take about 40 minutes or so. You can put it on broil for the last minute or so to get a nice browned top.  


Just a little tip,  the crisped edges are the best and will stick to the pan....More for you to scrape off later!
Unless you're at a party with Kim Merino, cuz she'll scrape all of it off and eat it. I have a pic of it somewhere...


Believe it or not, I think this recipe also calls for melted butter to be added in, but I started leaving it out and never noticed a difference so I don't use it anymore.
You should also try it with frozen broccoli in place of hash browns because I love it that way too.  

I should mention you can also add finely minced onion to the mix.  That tastes amazing. 
If you find your batch is too large (pshh, right.), you can freeze it and it defrosts well.   If you have leftovers, you can smear it on bread and make cracked out ham sandwiches.  Holy Crap those are delish.

Okay. Enough.  Crack Casserole.  Now you know.  With great power comes great responsibility...

I'm off to eat my way through another Super Bowl!  Tah!